
Learning how to rig a fishing pole isn’t as complicated as it looks! If you want to catch more fish, one of the most important things is how your fishing pole and reel are rigged. In this article, we will learn how to string a fishing pole and reel so that you can have the best chance at catching a big one on your next fishing trip! Regardless of what level your fishing skills are, you can use the information in this article to make sure your fishing pole is strung correctly so that it can catch fish perfectly for you.
Before we get into the nitty-gritty of how to string your fishing pole and reel, let’s learn how to hold a fishing rod.
Many people choose not to use anything but their thumb and index finger when they first start out, but this can actually lead to some errors later if it goes uncorrected. Note that there is no thumb resting on top of the fishing pole. This will give you more control and help maintain better accuracy as you improve! Also, make sure to avoid wearing jewelry or clothing with metal bits when you are out fishing – this can lead to problems if they accidentally come in contact with your line or a fish bites your line.
Now that you know how to hold the fishing pole, you need to select a good fishing spot! It can be helpful to find a landmark around your fishing spot so that you have something in the background when you are trying to land a big catch. This will help with accuracy and ensure that your target (and not your fishing pole) is always centered when you are trying to catch the fish.
Getting ready to cast? Make sure you know how far away your target is and that area of water where you want to cast. If a fish bites, make sure to pull back with a decent amount of force until it’s close enough that you can tell if it is the type of fish you want to catch. If it’s not, let out a decent amount of line and cast further away so that you don’t scare any nearby fish!
When you finally see a big one approach your line, watch carefully as they swim around your hook. You want to aim for them to take the bait with the opening of their mouth. You don’t want to aim too far back or too near the head – if you aim for them to take the bait in the wrong area, they may come unhooked!
Finally, pull back with a decent amount of force and reel in your catch when they get close enough!
Step 1: Choosing the Right Fishing Rod
Your fishing pole is an important tool for you to be able to use when trying to catch the fish you want. This is why it’s essential that you make sure your pole is at its optimal condition, and below we will learn how to do just this.
Start by taking apart your fishing pole so that all of the pieces are separated so that they can dry. Depending on how often and in what conditions you use your pole, it can be useful to perform this step each time before you go out to fish. This ensures that the components of your fishing pole will not rust or break if they get wet and stay wet for long periods of time.
If there are any cracks in your fishing rod where the pieces connect, you should purchase a new pole or try to reinforce the area with glue or tape. Avoid applying too much pressure on the areas around these cracks as this is a common place for your fishing pole to break!
Once your fishing rod is taken apart and dried from any excess water, it’s time to string the components back together! The next steps will provide you with information about how to do this.
A pole that is strung incorrectly can leave you with a faulty string or one that won’t stay in place. This means that your reel may slip from your hands and cost you the fish of a lifetime. It can be challenging to learn to string a fishing pole and reel quickly and accurately the first few times you try, but with practice you will be able to string your fishing rod in no time.
Step 2: Choose Your Fishing Line
The first step is to choose a fishing line. Fishing lines generally have a line class, which is generally indicated with A, B, or X. You can use any of these as long as the class is equal to or higher than the line test of your fishing pole. In most cases, you will be safe using 10-pound test monofilament for a spinning reel and 20-pound test monofilament for a bait casting reel.
Fishing lines also come in a variety of colors. Choose the color that best fits your fishing environment. Clear fishing line is great for lakes and pools, white fishing line is preferable for rivers and streams, blue lines are good for cloudy days and green lines work well on bright sunny days.
You can use either braided or monofilament line, but it is usually better to use braided line for saltwater and monofilament for fresh water. Fly line is designed for fishing with flies and can be difficult to cast. Fly line may also not be very durable if you are catching fish that fight back. You will need to use thick fishing line between 8-20lbs test.
Remember that the most important thing is your safety – if you are using braided fishing line, wear gloves! Braided fishing line is made by twisting together lots of strands of mono filament – when these tiny filaments are twisted together, they can cut your fingers.
Braided lines are super strong, but monofilament is more sensitive. This means that braided fishing line won’t stretch as much under pressure, so it’s less forgiving than monofilament when it comes to casting and handling your pole. Braided lines are smaller and more easily cast than monofilament, so in this instance it really is a matter of personal preference.
Monofilament lines come in floats or sinks. Floats are usually best for beginners, but it’s up to you. If you are fishing in freshwater, however, monofilament is the only choice you have.
If you choose a braided line, make sure to check the label and get a line specifically designed for fishing. Choose a line from 4-8 pounds in strength, depending on your preference and the type of fish you are trying to catch.
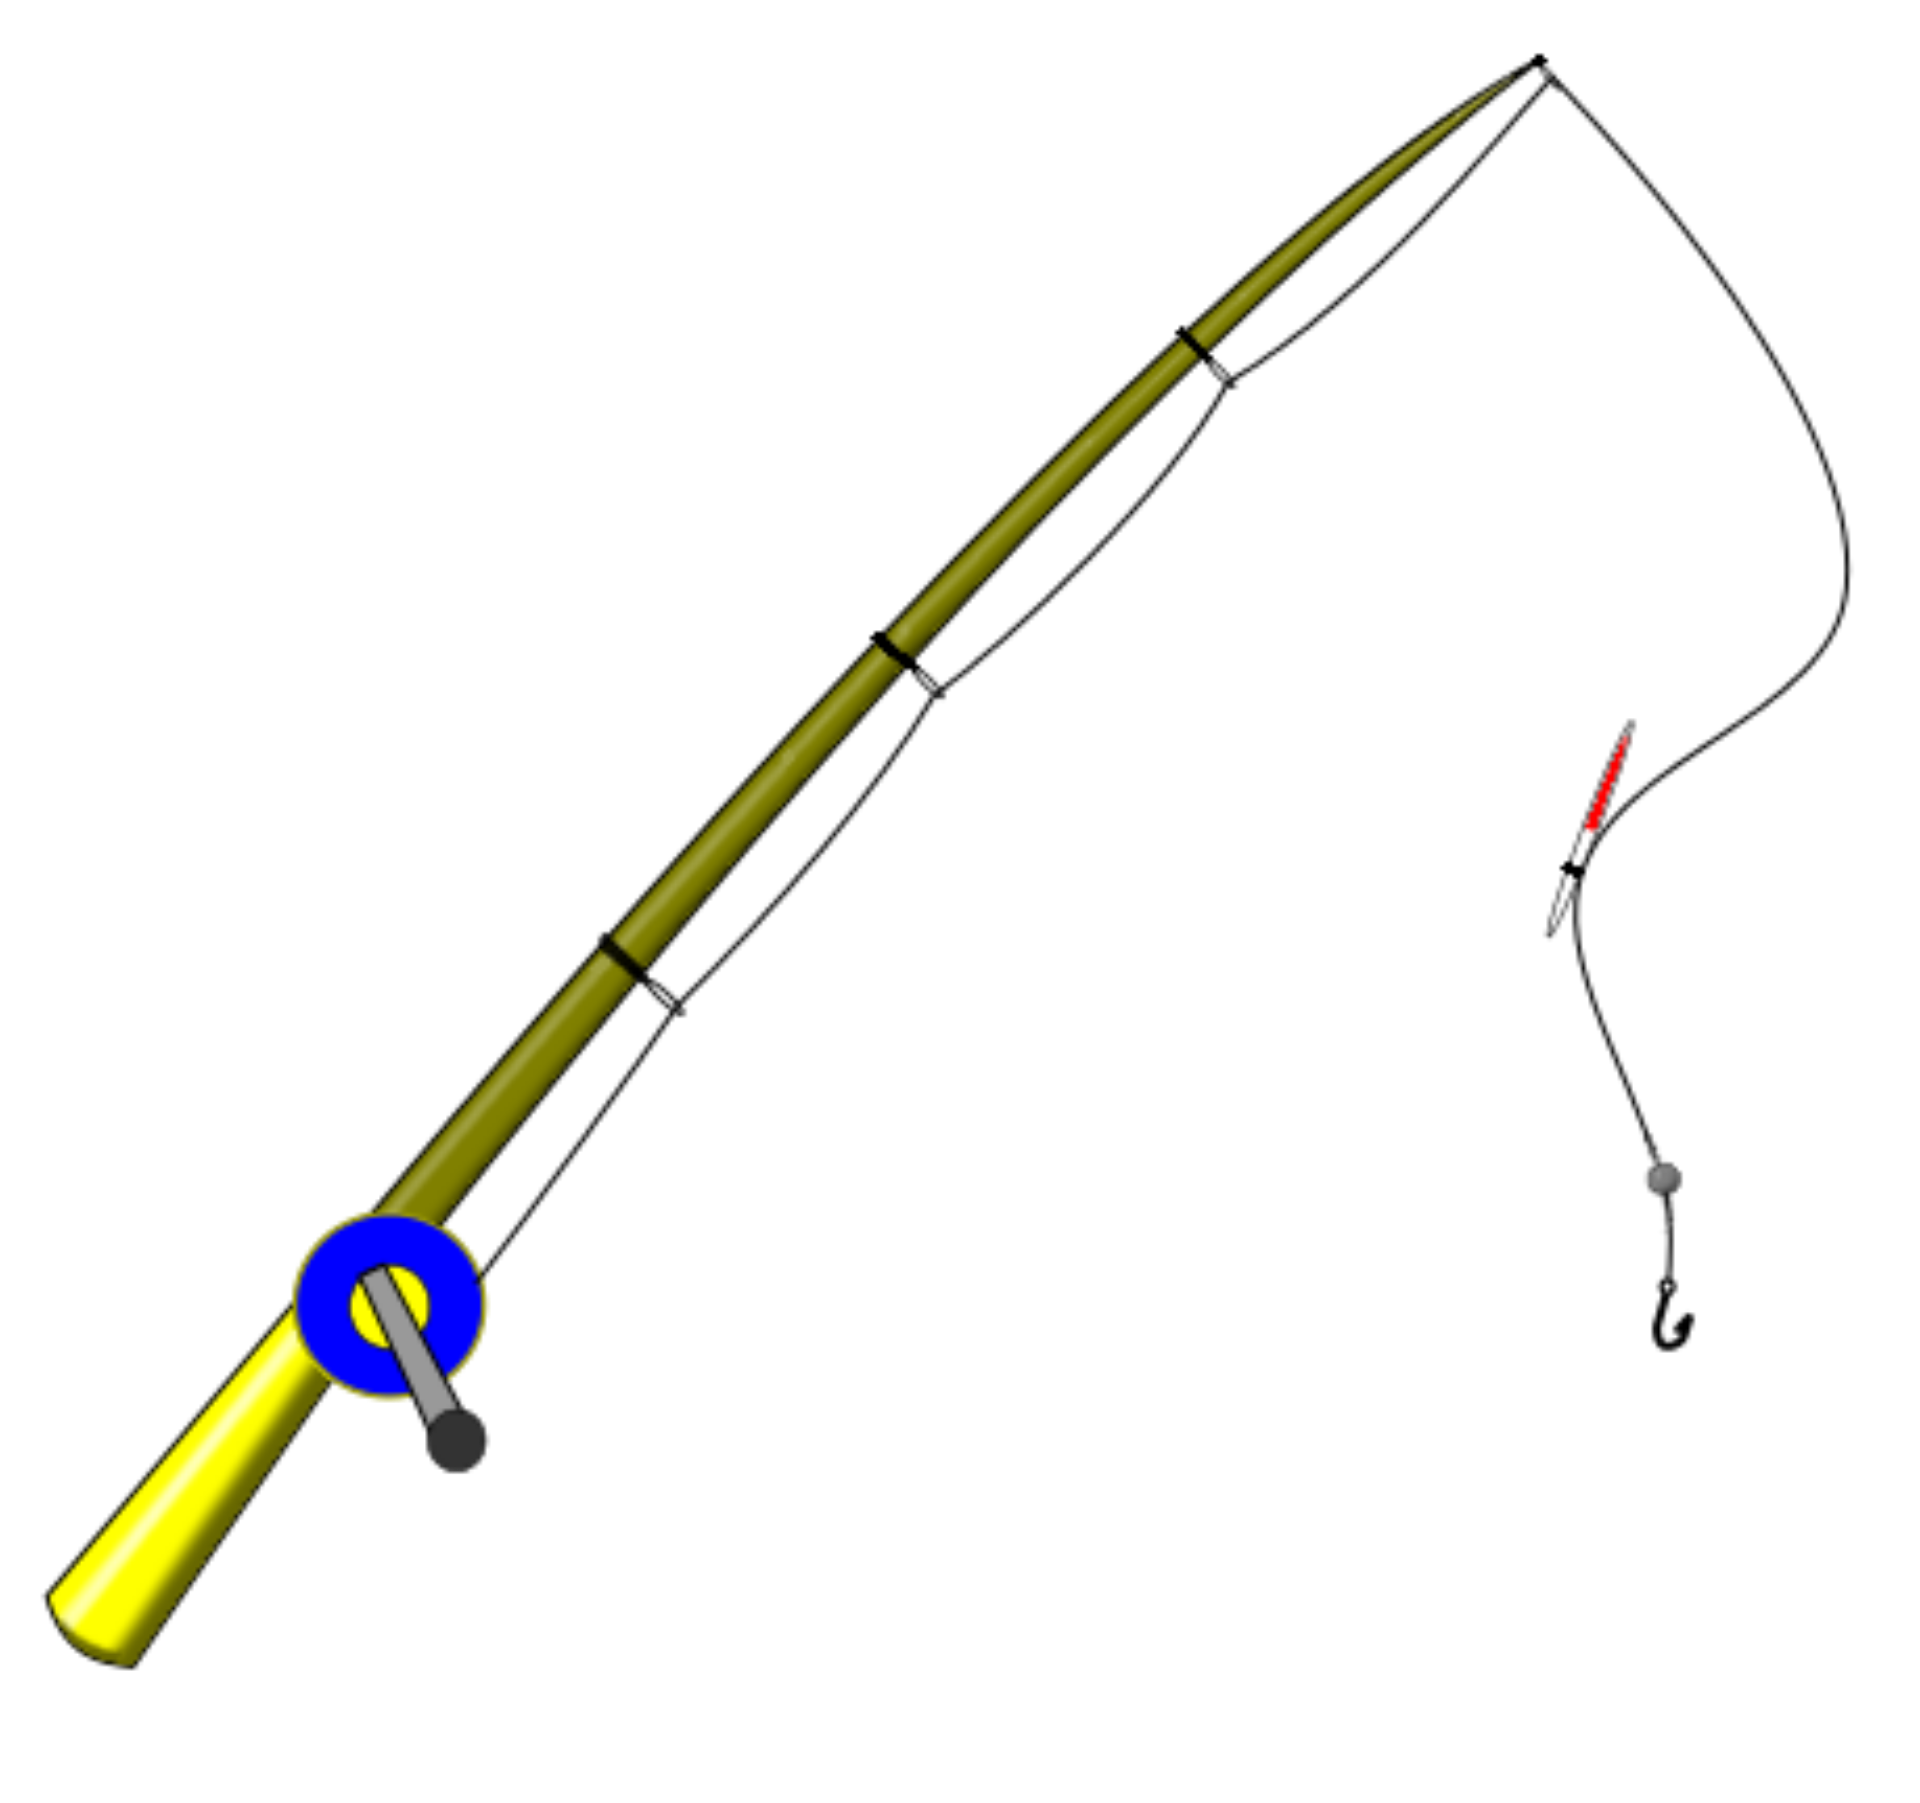
Step 3: Tie Your Fishing Line to Your Fishing Pole
Next, tie your fishing line to your fishing pole using a clinch knot. There are lots of different types of knots out there, so it’s a good idea to check out a few different types before you go fishing. Another great knot is the arbor knot. The arbor knot comes in a few different versions, but the one you should know is the “three turn” arbor knot. You could also use an overhand knot, but this is not as streamlined as the arbor knot. People choose the overhand knot because it’s easy to tie, but ultimately it is harder to use.
The best way to tie this knot is to take two turns around your fishing pole and then take one more big loop that goes from the eye of the pole to the standing part of your line. Then just pull it tight.
Once you have the right knot, thread your line through the tip top and down towards the handle of your pole, keeping it loose so that there is plenty of line behind the reel.
Once you get to the end of your pole, double back on your line and tie a “tag” to the tip top. This will prevent any damage to your pole or line as you pull it through. You can then tie on your lure and hook!
Use the metal loops as guides when you are threading your fishing line through the tip top of your pole.
It’s important that you use the same direction when tying on your lure and hook. This will give it more stability in the water. When fishing for bass, you want your line to be vertical, with the lure on top of the water with surface tension causing it to stay in place. If you are fishing for trout or catfish, then you want your line to go straight up. It is important that when fishing for catfish, you attach your shiner (a shard of metal around a hook) around the eye of your pole, not in front of it like when fishing for bass.
There are many different types of knots out there, so make sure you try them all if you are unsure before going on your next fishing trip!
Step 4: Tie Your Fishing Line to the Hook
If you are using a shiner for fishing as opposed to a lure, make sure you attach it to your hook before putting it on the end of your pole!
A shiner stays in one spot, which is perfect if you are going after catfish.
First, tie a clinch knot with your line around the eye of the hook. It’s important that you keep this loose so that it is easy to attach above and below the shiner. A loose knot allows for a little give and take, which is important for catching big fish.
To attach the shiner, simply thread your line underneath it and tie another clinch knot around the hook. If you want to use multiple lures or flutter spoons (a metal spoon with treble hooks), make sure that they are spaced out evenly along your fishing line. This will keep your line balanced, which will increase your chances of catching more fish.
The same direction that you attach your line to your pole, you should also attach it to the shiner. This will keep your hooks in a vertical position for bass fishing.
Step 5: Put Your Line Through Your Fishing Reel
A fishing reel is basically a spool with an axle. Before you put your line through the reel, make sure to take out all of the parts that are above the flywheel, including any ball bearings. These are used inside the fishing reel and are small enough to be lost accidentally by anglers who do not know to take them off before putting their line
There is a wide variety of fishing reels to choose from. If you’re a beginner, a spinning reel is a great choice. They work in both freshwater and saltwater. You can also get baitcasting reels for freshwater, but they work best in saltwater fishing. Trolling reels are great if you want to fish at different depths with one pole. A fly reel is designed for fly fishing.
For a spinning reel, simply open the reel and wrap your fishing line around it three times. Then simply close it and attach your tip top/star drag to the end of your pole. A spinning reel can be placed further down the pole than a baitcasting reel.
For baitcasting reels, make sure there is enough room on the spool (the round part that holds your line) for however much line you will need.
Once you have the right amount of line on your spool, attach a double uni knot to the end of the pole and then attach your tip top. Make sure that you have enough fishing line through your reel so that you can cast out into wherever you are going to fish.
Before putting your line through the reel make sure that there is no slack in the line coming out of the tip top (the metal piece on top of the pole). If you put your line through the reel with a lot of slack, it will be difficult to pull in your catch.
Once you have removed all of the slack from your line, tie an arbor knot at the edge of the reel’s frame. Make sure to use a strong knot so that almost no pressure can break it.
Now that you have your fishing line tied to your rod, it’s time to put your line through the reel. This can be tricky, but after you do it once or twice it’s easy. Take the free end of your fishing line and put it through the front side of the reel — not the reel seat!
Make a loop with the free end around one of the spindle’s support prongs, then pull the line through from the other side of the reel.
Now you have to tie an arbor knot with your fishing line directly in front of your reel. If you don’t feel confident in doing this, you can always purchase a reel with the line already attached. It’s more expensive but saves time and hassle. Most of them come pre-spooled, too!
Some reels come with a line guide already attached – if yours doesn’t, you should attach one before threading your line through the reel. To do this, hold up the line guide on either side of your fishing pole and begin feeding your line into the underside of the hole in the guide.
Do this slowly and carefully! It helps to tie a “tag” onto your line before you start tying it through the reel. Keep feeding until your tag is at the end of the reel, then make a loop with your fishing line.
Slide the line guide up against it, then tighten the loop. You want the line guide to be tight enough that it doesn’t slide around, but not so tight that you can’t pull the tag through.
Step 6: Cut Your Line to the Right Length
If your line is too long, it could get caught on branches when you are fishing. If it’s too short, however, there won’t be enough slack for your cast! You can always cut off more line later if you need to, but starting out with the right length will save you time and effort.
Finally, tie on your lure! Remember that casting with a fishing pole is all about practice – keep at it, and you will get better with every cast!
Final Thoughts
Now that you know how to string your fishing rod, you can get out there and catch some fish! Looking for gear? We’ve got you covered. Shop our online store now.